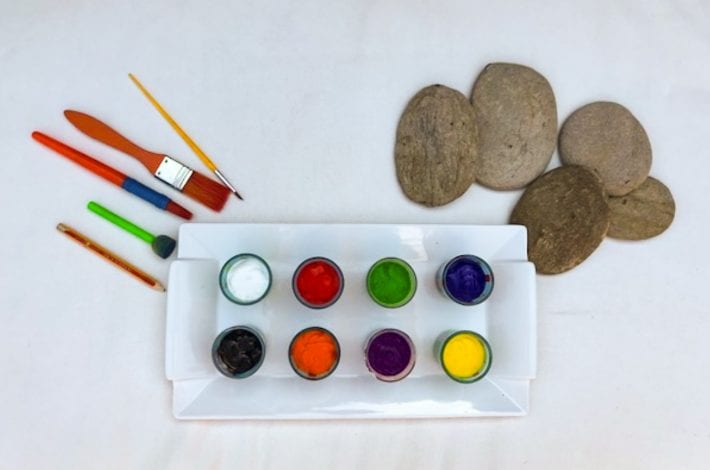
Ladybird Pebbles – Fun Rock Craft

9
Rock Craft - Ladybird Pebbles - End Result Out in the Garden

These fun and beautiful ladybird pebbles are quick and easy to do. Kids will love searching for just the right pebble, washing and painting it. The stones will instantly transform into pretty ladybirds as they add the black spots onto their backs. Enjoy this great rock craft for children of all ages!
1

Rock Craft - Ladybird Pebbles - What You Need
1

You will need:

  • Acrylic paints
  • Paintbrushes – one thick one small
  • Collection smooth stones
  • Pencil
  • Round sponge stick or cotton buds – optional

2

Rock Craft - Ladybird Pebbles - Step 1 Draw the outlines
2

Step 1: Let the wings take shape

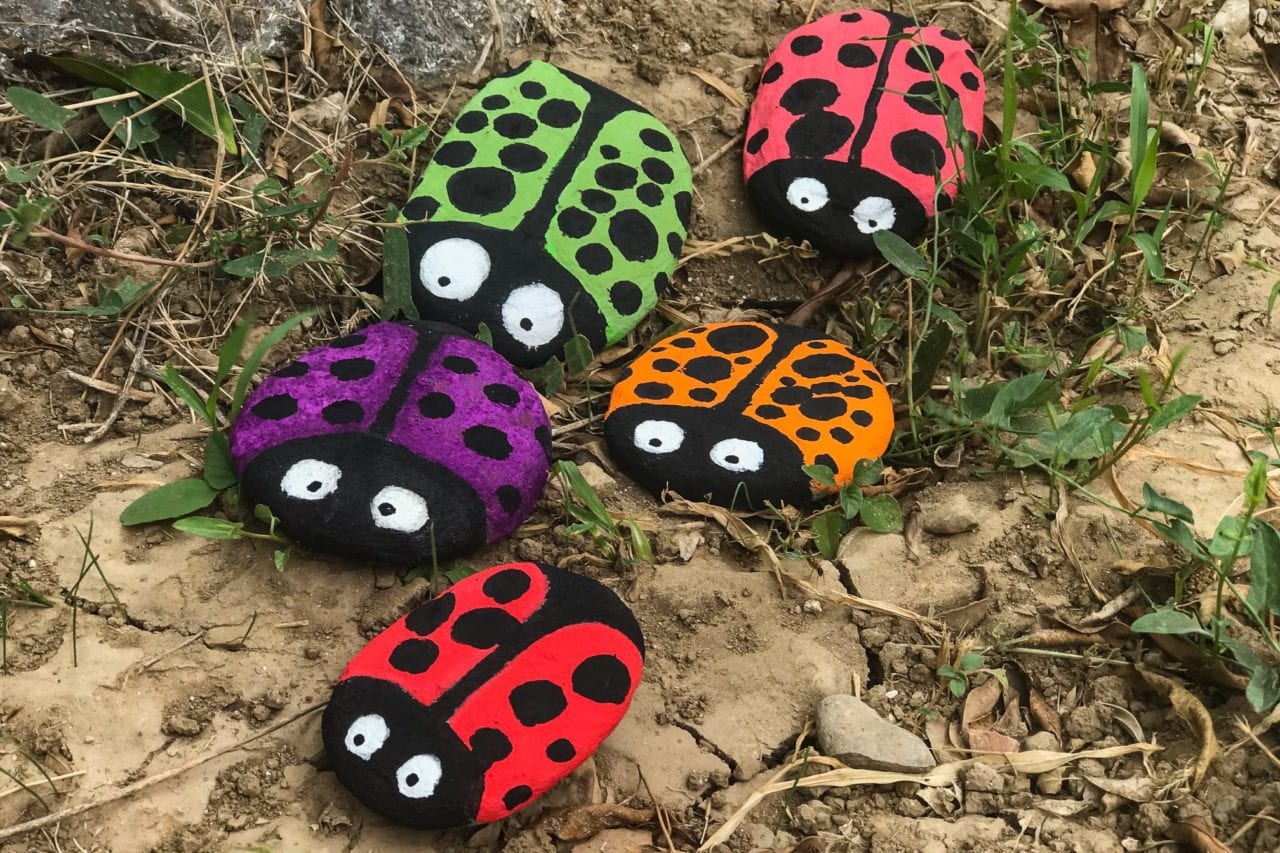
Collect some smooth round stones from a local beach. Wash them and pat them dry.

Decide on how big you want the ladybird’s face to be and how the wings will look.

Draw the outline of these areas with a pencil.


3

Rock Craft - Ladybird Pebbles - Step 2 Add more coats of paint
3

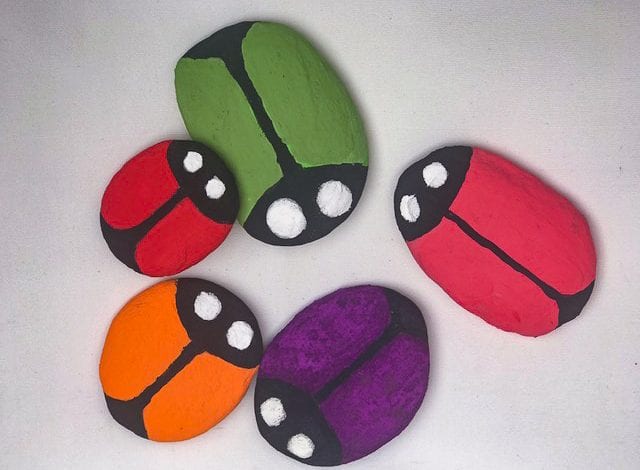
Step 2: Paint the ladybird face and wings

Colour in the wing areas in bright colours and the face, bottom and line down their back in black paint.

If you prefer to avoid the pencil outline, you could also paint the entire pebble one bright colour, let it dry, and then paint the black areas on top of it.

Add some white for the base coat of the ladybird’s eyes.

You may have to do 2 coats to help the colour set well.

4

Rock Craft - Ladybird Pebbles - Step 2 Paint the first coat and add eyes
4

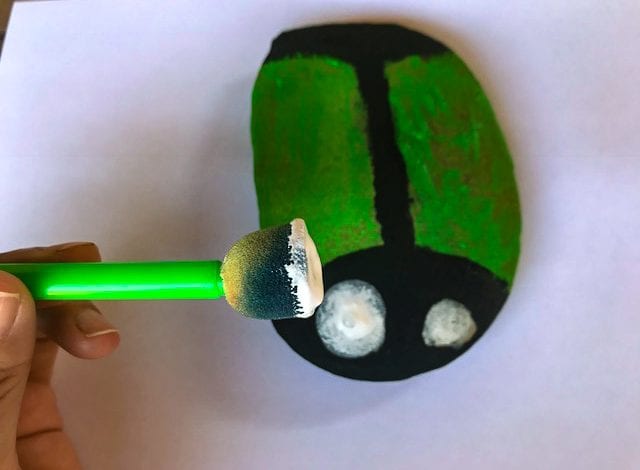
Step 3: Add the eyes

When the paint has dried, take a round sponge stick or a cotton bud.

Dip it in white paint and press it on the ladybird’s face to make the whites of its eyes.

5

Rock Craft - Ladybird Pebbles - Step 4 Add Dots
5

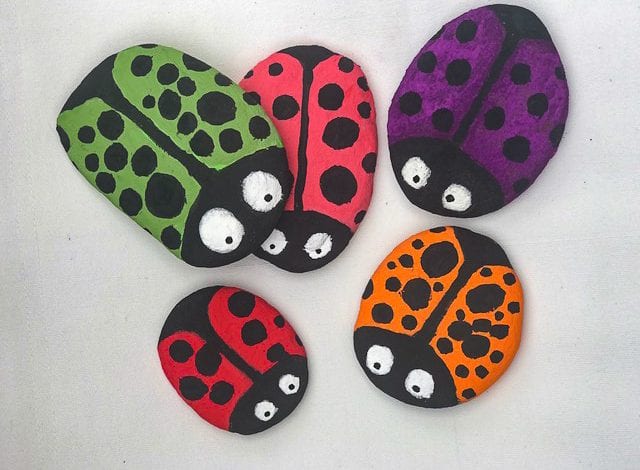
Step 4: Give it some spots

Use a thin paintbrush and black paint to add on the ladybird’s spots.

Make them lots of different sizes all over their backs.

You can also use a clean cotton bud again for the spots, or the sharp end of a paintbrush dipped in black paint.

Add two black dots for the ladybird eyes.

6

Rock Craft - Ladybird Pebbles Final Result
6

Step 5: Add varnish (optional)

If your ladybirds will sit out in the garden it’s a good idea to add some outdoor varnish so that they will last longer.

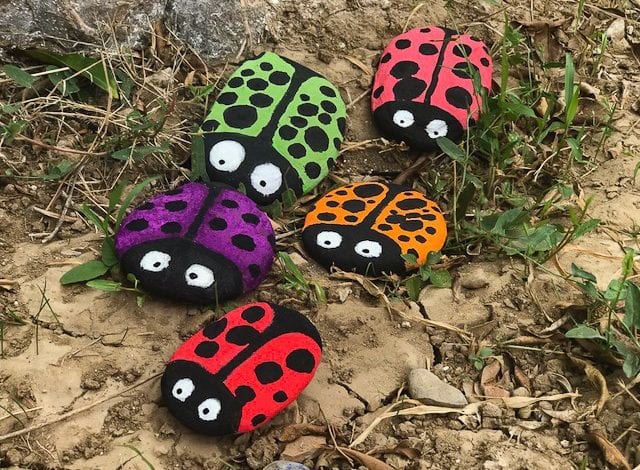
Lay them out around the garden for the whole family to enjoy!

If you’ve enjoyed making these pretty ladybird pebbles, try one of our other rock crafts. We have Rock Monsters, Unicorn Stones and even a Pebble Hedgehog Family.


Why not join the #Love on the Rocks craze and leave your pebbles for other rock craft makers to find?

Have you heard about the #Love on the Rocks craze that is taking over social media? It’s a craze that started in America but has made its way over to our shores and it keeps on growing. The idea is simple (and lovely). You simply paint some pebbles however you like. You could make the ladybird pebbles that we showed you above or simply paint pretty patterns or kind messages. Then gather your rocks and take them with you on a family walk. Hide your pebbles along the walk for other people to find as a little treat. Lots of Facebook groups are popping up all over the UK where people can add photos and messages about where they have hidden their rocks and where they have found them in their local areas. Search ‘Love on the rocks UK’ on Facebook to see if you can find a group near you or visit this one: Love on the Rocks UK.

Get FREE Phonics Flashcards

Grab our phonics letter pack today!

Join our weekly newsletter and get the best of our fun learning activities delivered straight to your inbox

newsletter printable
  • 15 first letter sounds
  • Initial sounds
  • Learn to read first words