Summary:
Time: 10 mins
Age: Toddlers to little kids
Difficulty: Easy peasy
You will need:
- 2 paper plates
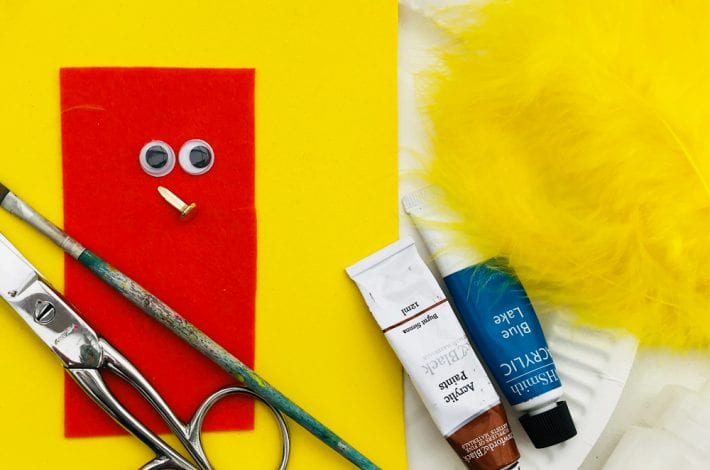
- Blue and brown paint – acrylic is best
- Paint brush
- Scissors
- Yellow card or felt
- Orange card or felt
- Yellow feathers
- Googly eyes
- Glue
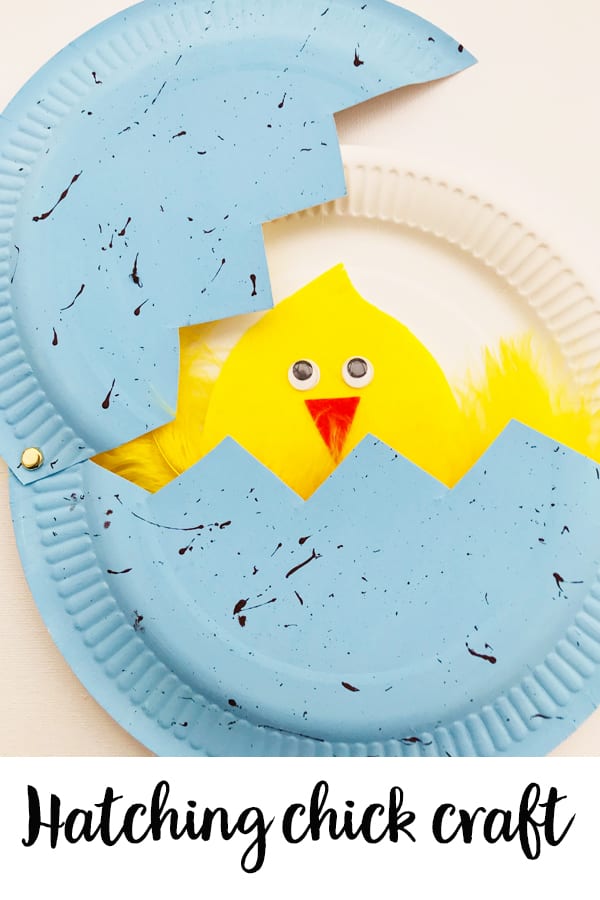
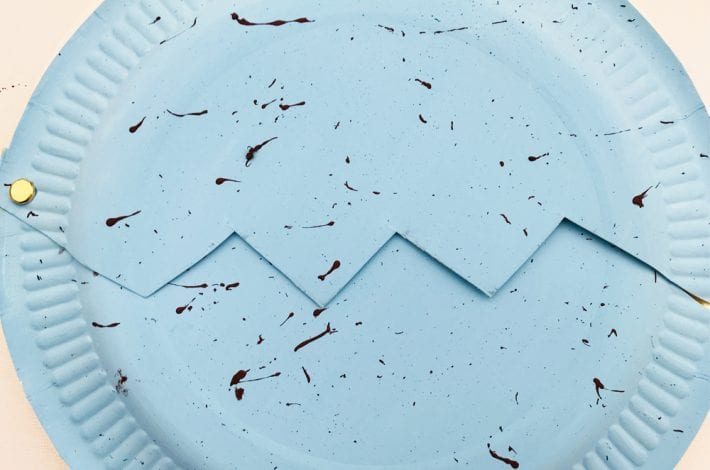
Step 1: Paint your paper plate
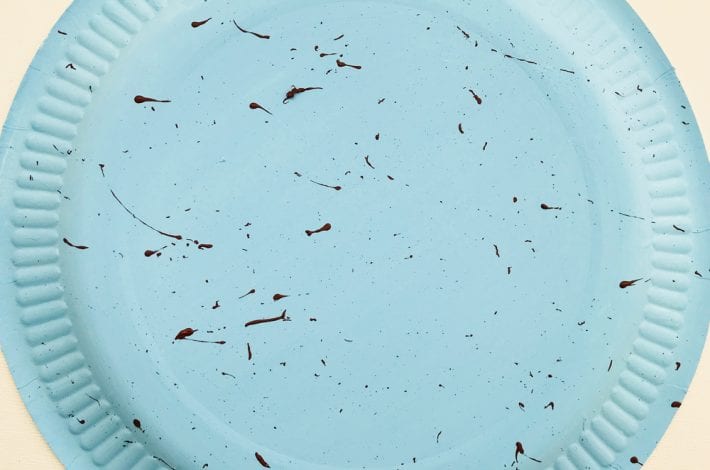
Take one of your paper plates, turn it upside down and paint it all over. We chose a nice duck egg blue and we find that acrylic paints work best.
Once you have painted it then take a paint brush and flick brown speckles of paint all over your background colour.

Step 2: Make zig zag cuts so your egg can hatch
When the paint has dried cut the plate in half with zig zag cuts so that it looks like an egg is cracking in two.
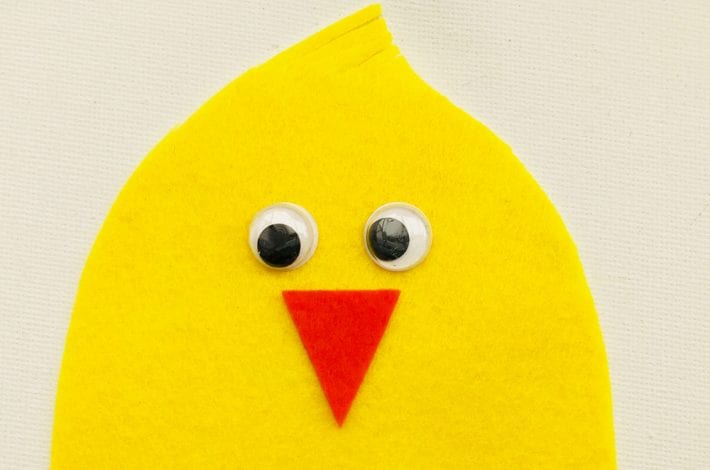
Step 3: Start making your little chick
Cut a rounded shape out of yellow felt or card, to make your chick.
Cut a little triangle out of orange card or felt and glue it in place as the beak.
Glue on two google eyes. PVA glue works well, or you could use a glue gun.
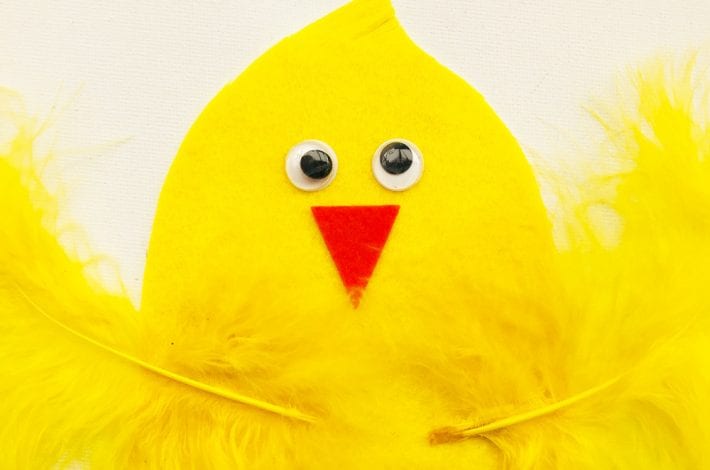
Step 4: Add some fluffy feathers
Glue two big yellow fluffy craft feathers to your chick’s body to make its wings.
If you don’t have any feathers you could simply cut two yellow wing shapes out of felt or card.
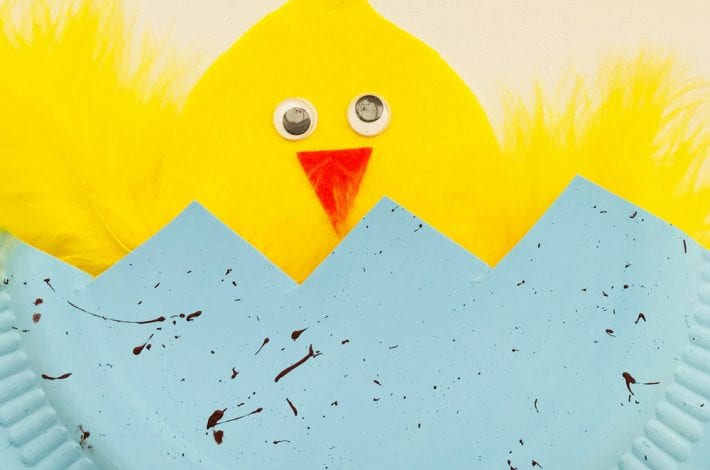
Step 5: Glue your little chick in place
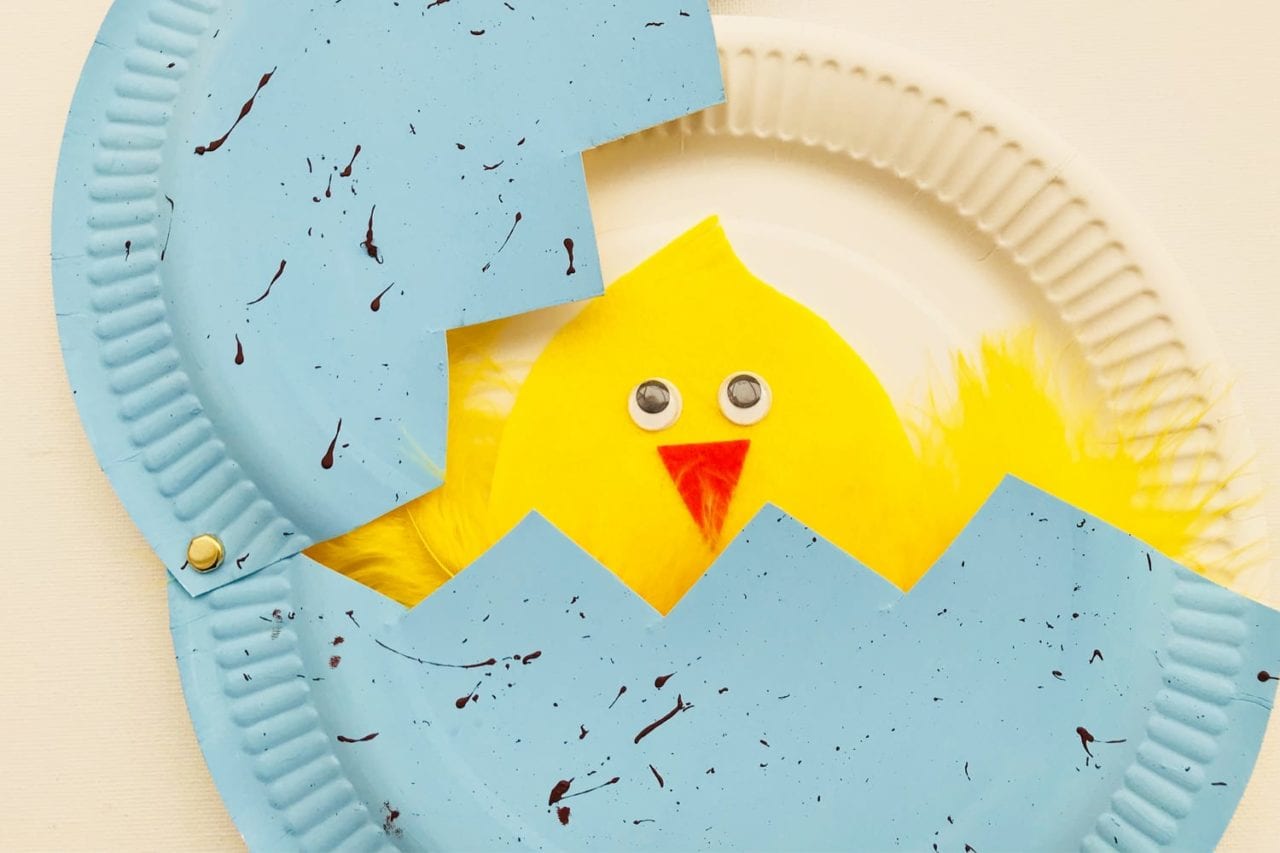
Glue your little chick to the back of the bottom half of your painted plate which is now your ‘egg’.
You can use glue or tape, whichever you prefer.
Step 6: Seal your chick inside the egg
Take the white paper plate and place it on a table. Then place the two halves of the painted egg on top.
First pop on the bottom half with the little chick peeping out. Then cover it with the top half of the painted plate so that the chick is hidden.
Make a small hole in the bottom plate and in the two halves of the painted plate at one side and pop a butterfly clip between them to secure them all together.
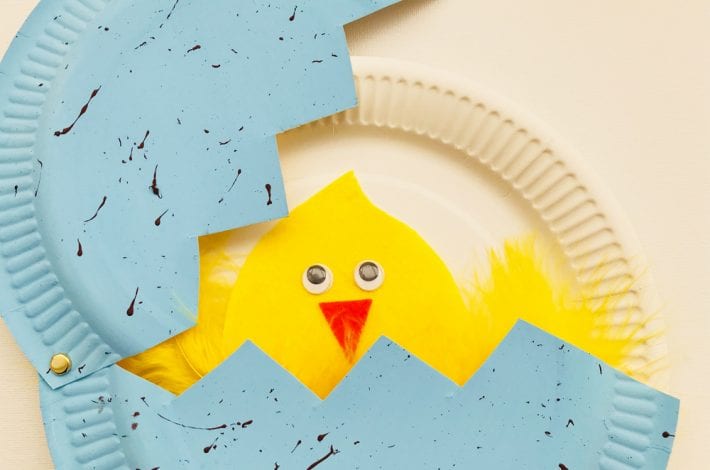
Step 7: Watch your chick hatch out of the egg
You can now slide up the top half of the paper plate to make your little chick hatch out of it’s speckled egg.